Give your AI chatbot the logged-in client
The problem
Many class businesses now run an AI chatbot or support widget on their website. Most questions it gets are personal: "When is Emma's next class?", "Did my payment go through?", "Can I book a make-up for last Tuesday?". A bot that doesn't know who it's talking to can only answer "please log in to your account".
The parent is often already logged in, through the Zooza profile widget on the same site. This example passes that identity to the chatbot, so it can:
- greet the parent by name and skip "what's your email?",
- hand the conversation to staff with the right client attached,
- look up the parent's bookings through your backend, safely.
How it looks
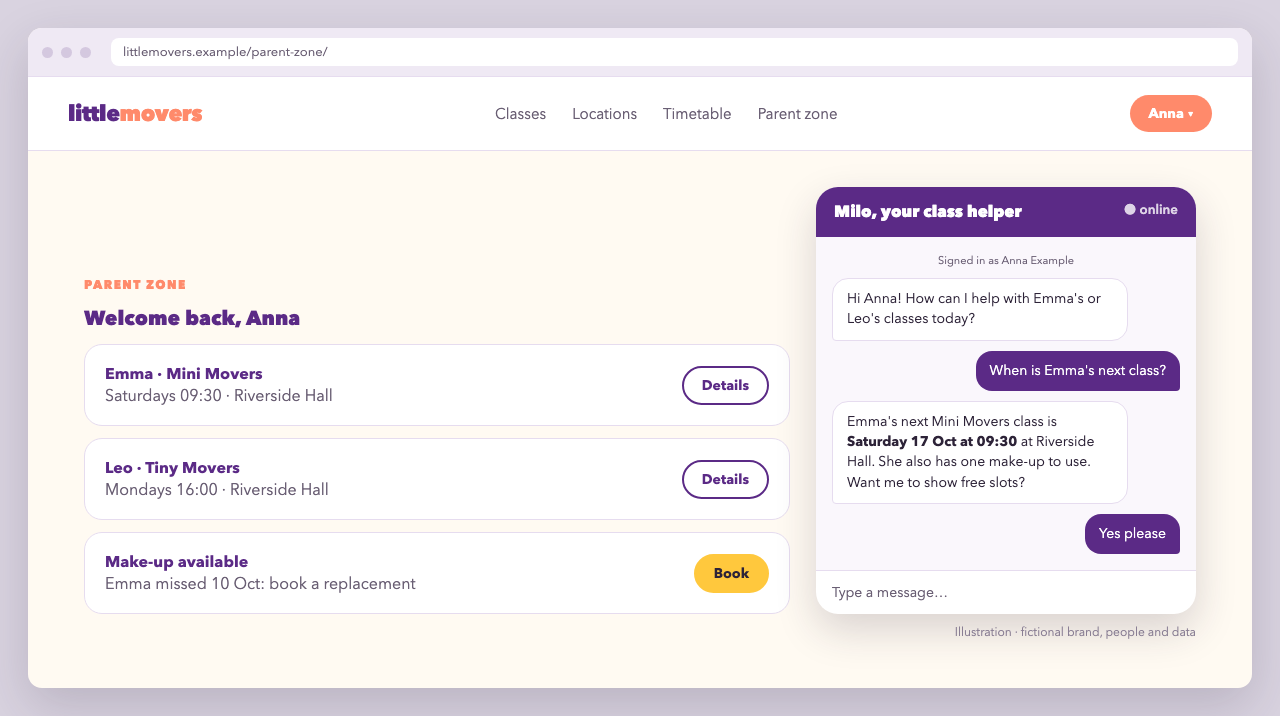
Illustration with a fictional brand and data.
What you'd have to build yourself
Without Zooza you would need your own client accounts, login, session handling and booking data, and a way to keep all of it in sync with the chatbot. Here, Zooza already owns the client account and login. You only listen to two browser events and forward a few fields.
Step 1: forward the identity to the chatbot
The profile widget fires zooza_user_logged_in and zooza_user_logged_out on document. The logged-in user is also kept in localStorage under zooza_user, so a parent who logged in on an earlier page is recognised too.
<script>
  ( function () {
    'use strict';

    // Adapter: the only part that depends on your chatbot vendor.
    var chatbot = {
      identify: function ( person ) {
        // Replace with your vendor's call, e.g. a "set user" / "update context" method.
        if ( window.LittleMoversBot ) {
          window.LittleMoversBot.setContext( person );
        }
      },
      reset: function () {
        if ( window.LittleMoversBot ) {
          window.LittleMoversBot.clearContext();
        }
      },
    };

    function to_person( user ) {
      if ( ! user || ! user.user_id ) {
        return null;
      }
      return {
        zooza_user_id: String( user.user_id ),
        name: [ user.first_name, user.last_name ].filter( Boolean ).join( ' ' ),
        email: user.email || '',
      };
    }

    function stored_user() {
      try {
        return JSON.parse( localStorage.getItem( 'zooza_user' ) || 'null' );
      } catch ( e ) {
        return null;
      }
    }

    // 1. Parent logs in while on the page
    document.addEventListener( 'zooza_user_logged_in', function ( event ) {
      var person = to_person( event.detail );
      if ( person ) {
        chatbot.identify( person );
      }
    } );

    // 2. Parent logs out through the widget
    document.addEventListener( 'zooza_user_logged_out', function () {
      chatbot.reset();
    } );

    // 3. Parent logged in earlier (another page, another visit)
    var person = to_person( stored_user() );
    if ( person ) {
      chatbot.identify( person );
    }
  } )();
</script>
Most chatbot vendors have a call for this. It is usually named "identify", "set user", "update" or "client context". Put it inside the adapter and leave the rest unchanged.
Only pass the fields above. Never forward a Zooza token or cookie to a third-party chatbot, even if it appears in the browser. Anyone holding that token can act as the parent in Zooza, and chat vendors store conversation context.
Step 2: let the bot look up bookings through your backend
Everything in Step 1 runs in the browser, so treat it as a hint (good enough for a greeting) and not as proof of identity. When the bot needs real data, such as next classes, payments or make-up options, route the request through a small endpoint on your server:
Chatbot (tool call: "get_bookings")
   │  conversation id + zooza_user_id
   ▼
Your backend ── verifies the person ── calls Zooza REST API with server credentials
   │                                     GET /v1/registrations?user_id=…
   ▼
Short, filtered answer back to the bot (next session, status, balance)
// Node.js (Express): a tool endpoint your chatbot calls
app.post( '/chatbot/tools/get-bookings', async ( req, res ) => {
  const { conversation_id } = req.body;

  // Your rule for trusting the identity: e.g. the chat vendor's signed
  // identity verification, or a one-time code you emailed to the parent.
  const user_id = await verified_zooza_user_id( conversation_id );
  if ( ! user_id ) {
    return res.json( { error: 'not_verified' } );
  }

  const response = await fetch(
    `https://api.zooza.app/v1/registrations?user_id=${ encodeURIComponent( user_id ) }`,
    {
      headers: {
        'X-ZOOZA-API-KEY': process.env.ZOOZA_API_KEY,
        'X-ZOOZA-TOKEN': await zooza_server_token(),
        'X-ZOOZA-COMPANY': process.env.ZOOZA_COMPANY_ID,
      },
    }
  );
  const { data = [] } = await response.json();

  // Return only what the bot needs, never the raw payload.
  // Pick the fields from the Registration schema in the API reference.
  res.json( {
    bookings: data.map( ( r ) => ( {
      id: r.id,
      // e.g. class name, next session, payment status
    } ) ),
  } );
} );
verified_zooza_user_id() and zooza_server_token() are yours to implement. See Authentication for obtaining a server token (client_secret) and the required headers, and GET /registrations in the API reference for all filters and response fields.
Why it's built this way
- The browser only says who is probably there.
localStorageand DOM events can be edited by anyone, so they are fine for personalising a greeting but not for releasing data. - The API key and server token stay on your server. The chatbot vendor never sees Zooza credentials.
- The bot gets a filtered answer, not the raw API response, so it can't leak fields the parent shouldn't see.
- Logout clears the context, so a shared family tablet doesn't keep the previous parent in the chat.
Variations
- Human handover: pass
zooza_user_idinto your help desk ticket, so staff can open the client in Zooza straight away. - Proactive messages: when a logged-in parent opens the timetable page, have the bot offer "Book a make-up for a missed class?" and link to the profile widget.
- Analytics: send a
logged_inevent with the hashed user id to your analytics tool to measure how many chats come from existing clients.